adorable no-bake cheesecakes
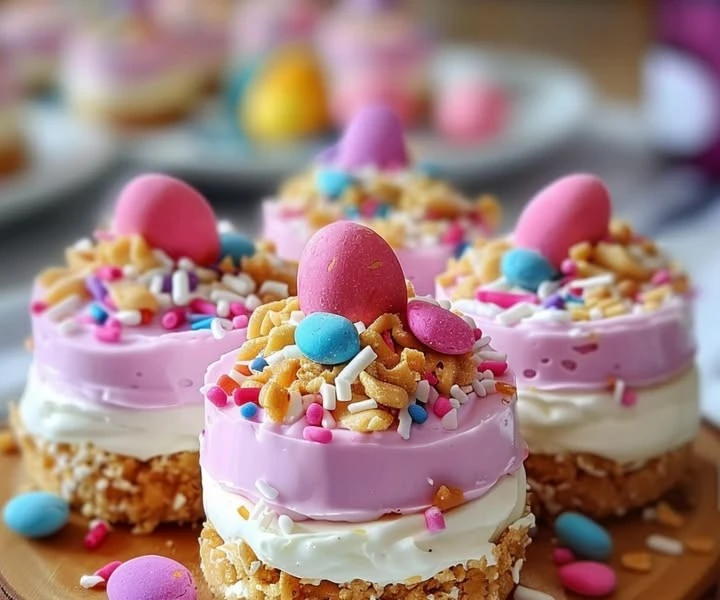
adorable no-bake cheesecakes: Spring is a magical time of year. The flowers bloom, the weather warms up, and family gatherings become more common. One of the highlights of spring is Easter brunch. While everyone brings their favorite dishes, one dessert stands out: no-bake cheesecakes. These little delights are not only easy to make but also incredibly tasty. They are perfect for sharing with family and friends, and they capture the spirit of the season in every bite. Today, I am sharing a fun and festive recipe for adorable no-bake mini cheesecakes that will take your Easter brunch to the next level.
Why you’ll love this recipe
This no-bake cheesecake recipe is great for many reasons. First and foremost, it requires no oven time. This means less time in the kitchen and more time enjoying the company of your loved ones. The mini sizes are perfect for individual servings, allowing everyone to enjoy their own little dessert. The creamy texture combined with sweet springtime flavors makes these cheesecakes a festive treat for your Easter celebrations. Plus, they are simple enough to whip up, even for beginners!
How to prepare No-Bake Mini Cheesecakes
Making these no-bake mini cheesecakes is a breeze! With just a few ingredients and easy steps, you’ll have delicious treats ready for your Easter brunch. Let’s dive into the ingredients and follow the instructions to create these delightful desserts.
Ingredients:
- 1 ½ cups graham cracker crumbs
- ½ cup unsalted butter, melted
- 2 cups cream cheese, softened
- 1 cup powdered sugar
- 1 teaspoon vanilla extract
- 1 cup heavy whipping cream
- Fresh fruit or chocolate shavings for topping (optional)
Instructions:
Prepare the crust: In a medium bowl, mix the graham cracker crumbs and melted butter. Stir until well combined. Press this mixture evenly into the bottom of mini cheesecake pans or cupcake liners to form the crust. Use your fingers or a small cup to pack it down tightly.
Make the cheesecake filling: In a large bowl, beat the softened cream cheese with an electric mixer until smooth. Gradually add in the powdered sugar and vanilla extract. Mix until well combined.
Add the whipped cream: In another bowl, use a mixer to whip the heavy cream until stiff peaks form. Once whipped, gently fold this whipped cream into the cream cheese mixture. Be careful not to deflate the whipped cream; you want to keep it light and fluffy.
Fill the crusts: Spoon the cheesecake filling into each prepared crust. Fill them generously, leaving a little space at the top if you want to add a topping.
Chill the cheesecakes: Place the mini cheesecakes in the refrigerator for at least 4 hours, or overnight if possible. This allows them to set properly.
Serve and enjoy: Once set, you can top the cheesecakes with fresh fruit or chocolate shavings if you like. Serve them chilled.
How to serve No-Bake Mini Cheesecakes
These mini cheesecakes are perfect for serving at gatherings. You can present them on a lovely platter or a tiered cake stand to make your dessert table look festive. If serving to a crowd, consider offering a variety of toppings like strawberries, raspberries, or whipped cream on the side so everyone can customize their cheesecake. They are delightful as a dessert, but you can also enjoy them as a sweet treat during coffee breaks!
How to store No-Bake Mini Cheesecakes
Storing these no-bake mini cheesecakes is simple. Keep them refrigerated in an airtight container. If you have leftovers, they can last up to 5 days in the fridge. Just be sure to cover them well to prevent them from drying out. If you want to make them a bit ahead of time, you can freeze them, too. Make sure they are well-wrapped in plastic wrap and then stored in an airtight container. When ready to serve, simply thaw them in the refrigerator overnight.
Preparation tips for No-Bake Mini Cheesecakes
Cream Cheese: Ensure your cream cheese is at room temperature before mixing. This makes it easier to blend and creates a smooth texture.
Whipped Cream: Don’t skip the whipped cream; it adds lightness and fluffiness to the cheesecake.
Use Cupcake Liners: If you don’t have mini cheesecake pans, using cupcake liners is a great alternative. They help in easy removal and cleanup.
Taste and Adjust: Before you fill the crusts, taste the cheesecake mixture. If you feel it needs more sweetness, you can add a bit more powdered sugar.
Chill Properly: The longer you let the cheesecakes chill, the better they will set. If possible, allow them to chill overnight.
Variations
If you’d like to mix things up, here are a few variations to try:
Chocolate Lovers: Add melted chocolate to the cream cheese mixture for a rich chocolate flavor, or use chocolate cookies for the crust.
Fruit Flavors: Incorporate fruit puree into the cheesecake mixture. Strawberry or blueberry can add a fresh and fruity twist.
Nutty Cheesecake: Add crushed nuts to the crust for added texture. Almonds or pecans work well.
Zesty Lemon Cheesecake: Add lemon juice and lemon zest to the cream cheese mixture for a refreshing citrus flavor.
Frequently asked questions
Can I make these cheesecakes in advance?
- Yes! These mini cheesecakes can be made a few days in advance. Just keep them stored in the fridge until you’re ready to serve.
Can I use a different type of crust?
- Absolutely! You can use Oreo cookies, shortbread cookies, or any cookies you like as a base for your crust.
What if I can’t find heavy whipping cream?
- If you can’t find heavy whipping cream, you can use any heavy cream or whipped topping, but the texture might be slightly different.
Are there any gluten-free options for the crust?
- Yes! You can use gluten-free cookies or gluten-free graham crackers to make a delightful crust.
How can I get creative with the toppings?
- Try different fruits, chocolate drizzles, or even caramel sauce. You can even sprinkle crushed cookies or nuts on top for an added layer of flavor.
In conclusion, these adorable no-bake mini cheesecakes are the perfect addition to your Easter brunch or any spring gathering. They are easy to make, can be customized, and are full of delightful flavors. You and your loved ones will enjoy every creamy, sweet bite. So gather your ingredients and get ready to impress everyone with these festive treats!