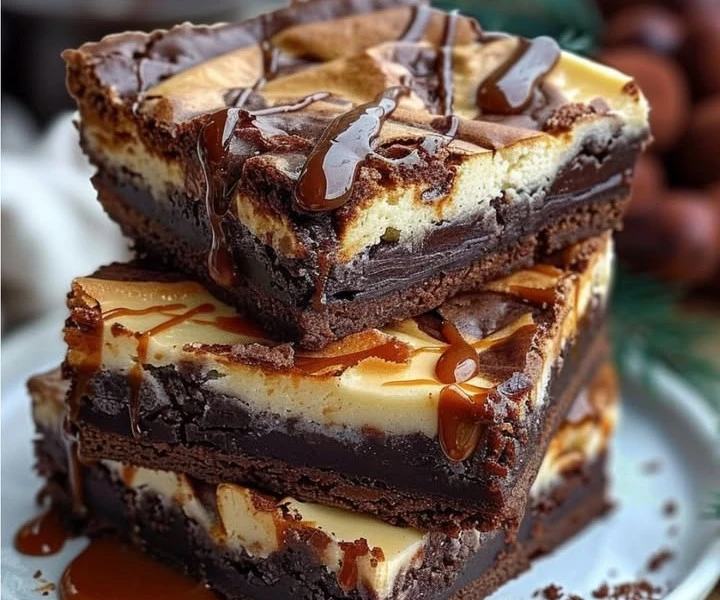
This Magic Candy takes me back to childhood, watching in awe as sugar transformed into something sweet and crunchy!
Introduction
Magic Candy is a delightful treat that can bring back memories from childhood. Many of us remember standing by the kitchen counter, watching, and waiting in excitement as sugar transformed into a sweet, crunchy snack. Making Magic Candy is not just about the flavors; it’s about the joy of cooking and the happy moments shared with family and friends. In this article, we will explore how to prepare this nostalgic candy, the ingredients needed, and some tips on serving and storing it. Prepare to dive back into a sweet adventure!
Why you’ll love this recipe
You will love this recipe for many reasons. First, it’s simple and easy to follow, making it perfect for both beginners and experienced cooks. You don’t need any fancy equipment; just a few common kitchen tools will do. Second, the ingredients are easy to find and most likely already in your pantry. Third, the final product is a delicious treat that you can enjoy at any time. Whether sharing it with friends or having it as a snack, Magic Candy will surely delight everyone who tries it.
How to prepare Magic Candy
Preparing Magic Candy is a fun and straightforward process. You will only need a few simple ingredients, a little patience, and a bit of love to make this delightful treat. Let’s look at everything you need to create your very own Magic Candy!
Ingredients:
- 1/4 cup butter
- 3/4 cup brown sugar
- 1 cup sugar
- 1/4 cup corn syrup
- 1 tsp vanilla extract
- 1/2 cup chopped nuts (optional)
- 1/2 cup mini chocolate chips (optional)
Instructions:
Prepare your workspace: Start by clearing off the counter and gathering all your ingredients and tools. You will need a medium-sized saucepan, a wooden spoon, a candy thermometer, and a baking dish.
Melt the butter: In your saucepan, melt the butter over medium heat. Stir it gently as it melts to ensure it does not burn.
Add the sugars and corn syrup: Once the butter is melted, add the brown sugar, regular sugar, and corn syrup to the saucepan. Mix everything well until it is well combined.
Heat the mixture: Continue to cook the mixture over medium heat. Stir frequently to prevent sticking and burning.
Use the candy thermometer: Place your candy thermometer into the mixture. You want to bring it to the soft ball stage, which is about 240°F (115°C). This process can take around 10 minutes.
Remove from heat: Once it reaches the desired temperature, remove the saucepan from heat. Be very careful; the mixture is incredibly hot!
Add the vanilla: Stir in the vanilla extract and mix well. If you are adding any nuts or chocolate chips, this is the time to stir them in.
Pour into the baking dish: Grease a baking dish or line it with parchment paper. Carefully pour the candy mixture into the dish and spread it evenly.
Let it cool: Allow the candy to cool completely at room temperature. This can take about 1 to 2 hours.
Cut into pieces: Once cooled, use a sharp knife to cut the candy into small squares or rectangles. Enjoy your homemade Magic Candy!
How to serve Magic Candy
Magic Candy is a versatile treat that can be served in various ways. You can serve it in small pieces at parties, wrap it as gifts for friends, or simply enjoy it as a snack. Placing it in a nice bowl or on a decorative plate can make it more inviting. You could also pair it with a warm drink, like hot chocolate or coffee, to enjoy its sweet crunchiness even more.
How to store Magic Candy
To keep your Magic Candy fresh, store it in an airtight container. This will help it maintain its crunchy texture. If you live in a warm climate, it is best to keep it in the refrigerator to prevent it from getting sticky. However, if you prefer it at room temperature, make sure it is stored in a cool, dry place away from sunlight.
Preparation tips for Magic Candy
- Use a candy thermometer: This tool is essential in ensuring that your candy reaches the correct temperature for the best texture.
- Stir consistently: Frequent stirring helps prevent the mixture from burning and ensures even cooking.
- Be careful of the heat: The candymaking process involves very hot sugar mixtures, so use caution while cooking and pouring.
- Experiment with flavors: Feel free to add your favorite flavors or ingredients, such as coconut flakes or dried fruits, to make this candy your own.
Variation
If you want to change things up, here are a few variations you can try:
- Chocolate-coated Magic Candy: After cutting the candy into pieces, dip each piece in melted chocolate for a delicious twist.
- Nut-free version: Simply omit the nuts to make a nut-free candy that everyone can enjoy.
- Flavor variations: Experiment with different extracts, like almond or peppermint, to give your candy a unique flavor profile.
Frequently asked questions
1. Can I make Magic Candy without a candy thermometer?
Yes, you can try the cold water test instead. Drop a small amount of the mixture into cold water. If it forms a soft ball, it is ready!
2. How long does Magic Candy last?
When stored properly in an airtight container, Magic Candy can last for up to two weeks.
3. Can I freeze Magic Candy?
While it is not recommended to freeze this candy, you can keep it in a cool place for storage. If you must freeze it, wrap the pieces well to prevent freezer burn.
With its simple ingredients and easy steps, making this Magic Candy can become a cherished family tradition. You can bring back the joy of childhood through its sweet and crunchy goodness. So why wait? Gather your ingredients and start making your Magic Candy today! Enjoy the process and share the delicious results with loved ones. Happy cooking!

